DIY Install: Room with a View: Part 3
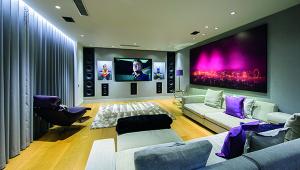
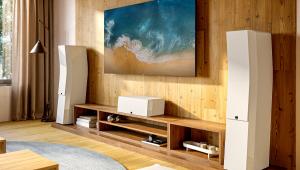
In Part 1 and Part 2 you’ve seen how we designed and specified this mid-range home cinema room project. Now we’ve arrived at the delicate point of fitting the rear speakers and the projection screen casing. It’s a case of ‘all hands on deck’, as the massive screen arrives and we start to wonder whether the ceiling will hold it…
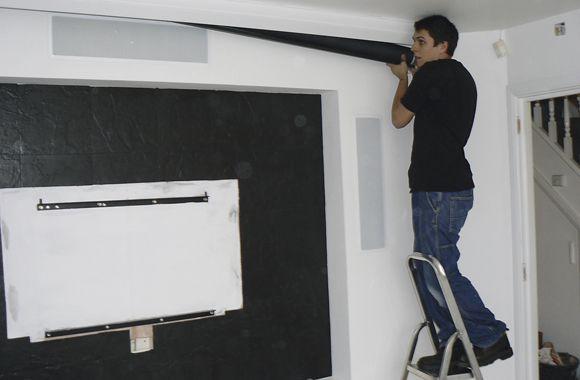
Step 1: The screen goes in
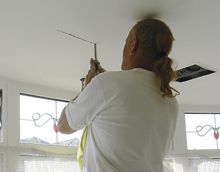
Our first task was to secure the projection screen casing to the ceiling joists. A power supply cable runs up to the casing behind the wall, connecting to the motor, which operates the screen’s trap door. The projection case is now ready to accept the screen fabric, which arrived in such a giant container that we had some difficulty manoeuvring it through the door.
The fabric, Screen Research’s THX-certified ClearPix2 woven material, will be lowered in front of the in-wall left/centre/right speakers without affecting their performance. The THX/ISF-certified black backing will suppress reflections behind the screen and boost the perceived contrast ratio. That’s if we don’t tear it while installing it!
Step 2: And then the other one...
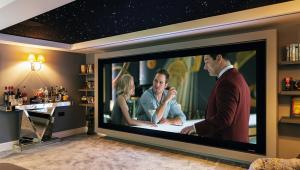
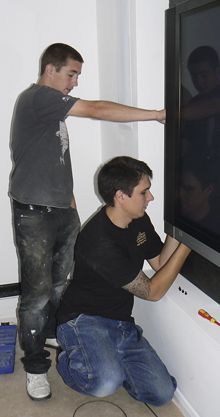 The front-facing Definitive Technology Reference UIW RLS11 speakers were finally fitted and fixed into the timber frame, which forms part of the screen-wall. The well had been tiled with black slate, chosen to provide a stark contrast with the white walls and provide some subtle shadow effects when the system’s backlight is engaged, and a plasma screen mount was fitted in the recess.
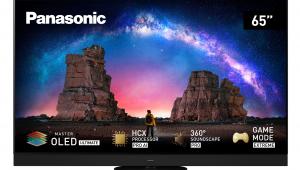
The plan was to fit Panasonic’s own wall-mount for the TH-65PX600 65in TV, but in use it stood out too far from the wall. We ended up with a Future Automation PF65 mount, which is just 30mm thick and allowed the screen to sit much closer to the wall. The TV’s built-in speakers would be adequate for general use when we didn’t want to fire up the whole system.
Before it could be hung and secured in place, supporting the 79kg screen while we plumbed in all the connections (including HDMI, component, Scart and aerial) was a massive task (okay, there are slightly lighter plasma screens available now, but you’re still looking at over 70kg in many cases). While we were doing this, we fitted Apollo LED light bars (from www.apollolighting.co.uk) behind the screen for a bit of ambient lighting. These light tubes come in a range of sizes – we went for four 24-inchers, designed to bounce light off the back of the recess to provide an Ambilight-style effect. We’d better hope they’re reliable, as it’s not going to be easy to move the TV to service the lights.
Step 3: Rear action
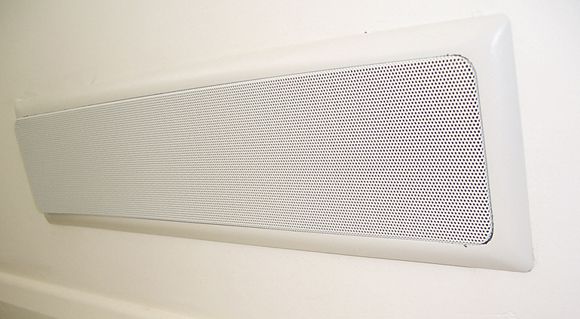
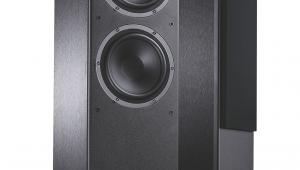
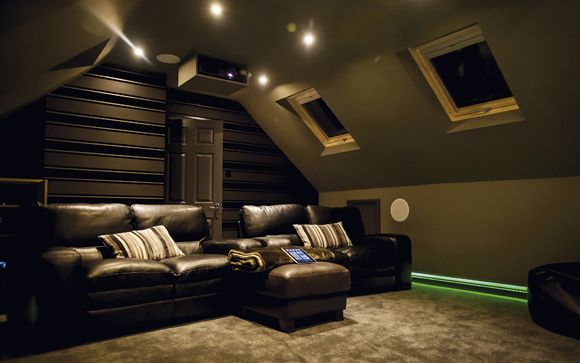
Fitting the rear speakers was the next job. Positioned either side of the projector mount, the speakers were designed to give a strongly steered effect from the side to the back of the room. There’s not much point trying for infinite subtlety in a room this size; unless you have a marked transition from side to rear, you aren’t really going to get the benefit of 7.1 sound.
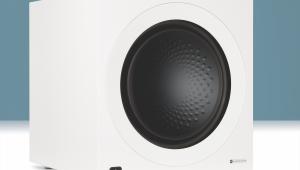
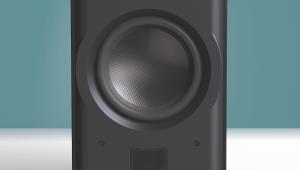
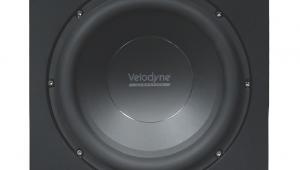
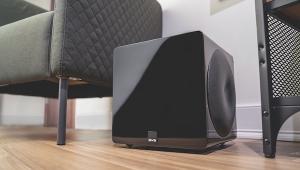
Then it’s back to the in-wall Velodyne subwoofers for their final stage, the fitting of the grille covers. While these will be the only elements of the subwoofers visible when the assembly has been completed, they prove strangely reluctant to co-operate, the metal moulding refusing to locate without an immense struggle and the help of Velodyne’s UK distributor Redline. No, we weren’t trying to fit them upside-down!
Step 4: Keeping it cool
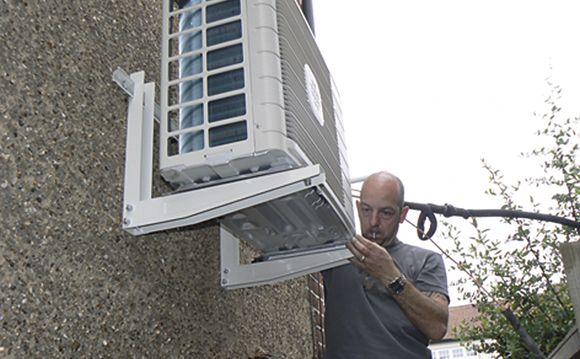
If you’re working on your first dedicated home cinema project, you may overlook the importance of air conditioning. But once you have a projector and an amp going in an enclosed space, you will rapidly suffocate if you don’t think about ventilation. Siting the equipment outside the room helps, but we didn’t have that option.
The problem with conventional air-con, of course, is the noise it creates, so we went for a Daikin FTXG-35EV, A-rated for energy efficiency, standing just 15cm from the wall and offering an operational noise level of around 22dB in operation (about the same as many modern projectors). Of course, there’s also an exterior unit to take into account, so you must consider the noise that is going to make, too. However, as the Daikin runs at only 44dB outside, it’s still not a major concern. You may well find that a typical DIY warehouse-type air-con unit is a lot noisier, so choose carefully.
Step 5: And let there be dark
Having completed the Niko smart lighting system (see Part 2), we realised that we could automate the curtains and tie them into the lighting. Using a bespoke aluminium track for the bay window from Goelst, we fitted an electric spur for the motor. Goelst’s 6200 G-Rail track system comes with its own programmable remote control as standard, but we integrated it with the Niko system so we could open or close the curtains from the light switch. The curtains we chose were, of course, fitted with blackout backing to ensure optimum movie-viewing conditions, but as the Goelst motor can handle up to 15kg in weight it would have no trouble with them.
Step 6: Silent running
 Settling on an LCD projector to preclude the possibility of fan noise from a DLP, we chose the Mitsubishi HC5000 (which has now been superseded by the HC6000). The projector is situated above the seating position – so we had to be really sure about the security of the mount.
Of course, we had already run the interconnects to the projector, but for a bang-up-to-date system, probably only one HDMI and possibly one component connection would be necessary.
Step 7: Getting comfy
The final steps were carpeting and furnishing, not something you’ll want to do before all the fitting work is finished. Of course, the carpet has a good deal to do with the acoustics of the room, so don’t be tempted to dispense with it and go for wooden floors, as these will cause too much reflection.
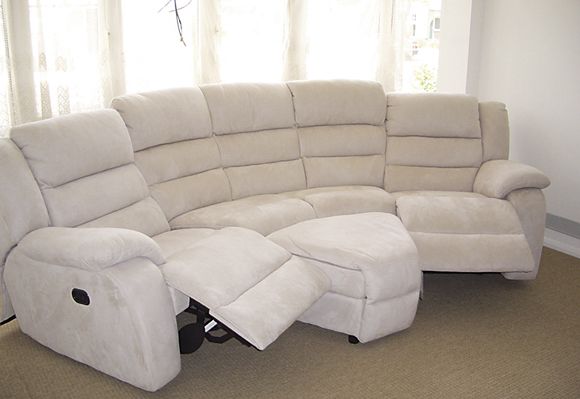
As for seating, while we looked at dedicated home cinema chairs, in the end the size and price ruled them out; we needed a four-seater which would fit in the window-bay, so we turned to perennial favourite DFS. A curved Vetta electric four-seat recliner costing just over £1,000 did the job. However, even having previously removed some brickwork from the window bay, the sofa only just fitted the space.
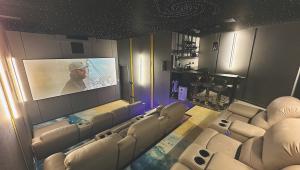
So the job’s done. The only thing left is to fire it up and see whether our careful planning and specifying has paid off!
Next time: Our cinema room gets put through its paces – are we happy with the end result?
DIY KIT CHECKLIST...
Speakers: Velodyne SC-IW SubContractor in-wall subwoofer, £1250
 SC-BB: backbox, £220
SC-1250: power amp, £1350
Redline
tel: 01268 858 222
Definitive Technology Reference Series: UIW RLS11 L/C/R speakers, £799 per speaker
Reference series: UIW RSS11 Surround speakers, £549 per speaker
Pulse Marketing
tel: 01279 647 039
Cables:
Ixos XHS523: speaker cable, £4.99 p/metre
HDMI: 15m, £220 Custom lengths to order: VGA 15m @ £35 p/3m
S-Video: 15m @ £34.99 p/5m
Component: 15m @ £79.99 p/5m
Composite: 15m @ £39.99 p/3m
IXOS
tel: 01844 219 000
Screen: Screen Research THX Acoustic Transparent in-ceiling trapdoor screen (product code MS-IT-110-178-2W-B): inc motor controller, £Enquire
Pulse Marketing
tel: 01279 647 039
Lighting: Niko Home Automation & Lighting Systems
USD
Tel: 01525 877707
Building materials: Gyproc Soundbloc 12.5mm 2400mm x 1200mm, approx £10 per board
Insulation Express
Green Glue: Around £13 per tube
Green Glue
tel: 01303 230944
This article first appeared in the February 2012 issue of Home Cinema Choice


 |
Home Cinema Choice #351 is on sale now, featuring: Samsung S95D flagship OLED TV; Ascendo loudspeakers; Pioneer VSA-LX805 AV receiver; UST projector roundup; 2024’s summer movies; Conan 4K; and more
|
| Hardware | Software | Features Installs | Latest News Awards Newsletters | Resources | Subscriptions |
WHERE TECHNOLOGY BECOMES ENTERTAINMENT
 © 2026 Home Cinema Choice
AVTech Media Ltd
All rights reserved