Surround sound explained: from 5.1 to Dolby Atmos, DTS:X and room EQ
Of course, buying the equipment is only one part of the journey. To get the best from your multichannel setup, consideration of speaker placement is key, before you get into system EQ and the effects of your room environment. Spend time getting it right (or as right as you can), and you'll be on the path toward a sound performance that perhaps Mr Lucas would be proud of.
Before we get into the dos and don’ts of sonic setup, however, let’s take a trip back in time…
In a mixing studio far, far away
The development of cinema sound from the mono mixes of the first talkies to the object-based Dolby Atmos and DTS:X tracks of today was far from linear. Lucas’s famous comment came at a time when multichannel audio was still in its infancy and approaches to it were varied. Mono soundtracks still dominated, but the likes of four-track CinemaScope – and even seven-track Cinerama – had already shown what could be achieved, albeit only in those cinemas with the necessary playback hardware.
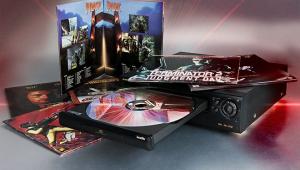
Enter Dolby, then a specialist in noise reduction. First, in 1976, it introduced the Dolby Stereo format. Despite the name, this provided four-track audio (left, centre, right and a single surround channel) via an optical track on 35mm film – a more commercially viable solution for theatre owners than magnetic-strip 70mm. Yet the innovations didn’t stop there, with Dolby boffins reworking the six-track magnetic 70mm Todd A/O format into six-track stereo with dual LFE channels.
Lucas’s Star Wars would ship out in both Dolby Stereo 35mm and Dolby 70mm Six Track Stereo prints. Along with 1977's Close Encounters of the Third Kind, and 1979’s Apocalypse Now (the first movie with split surround channels), it marked the birth of the surround sound era.

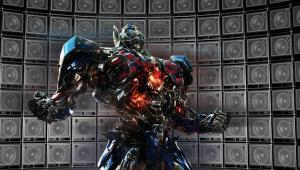
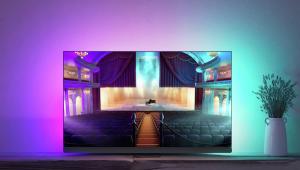
Skip forward some 40-plus years, through the introduction of Dolby Digital 5.1 in 1992, the 6.1-channel Dolby Digital Surround EX format in 1999, Dolby 7.1 Surround in 2010 and Dolby Atmos in 2012 (with Brave, pictured above) and, amidst the changes, much remains constant. With a few rare exceptions, all new movies are mixed and released in multichannel, with left, centre, right, left surround, right surround and LFE – and these remain the starting point for any discrete, multichannel home cinema setup.
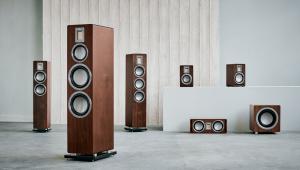
5.1 surround
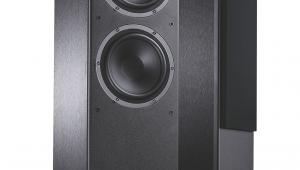
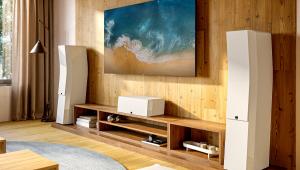
A 5.1 speaker array will get you all that broadcast TV and DVD has to offer, while these six channels also do the heavy lifting in a 7.1 or Dolby Atmos/DTS:X system. With the latter, you may well find yourself having to make compromises (more on that later), so the fewer made when installing your 5.1 system the better. Where to begin? Paradoxically, it involves your display.
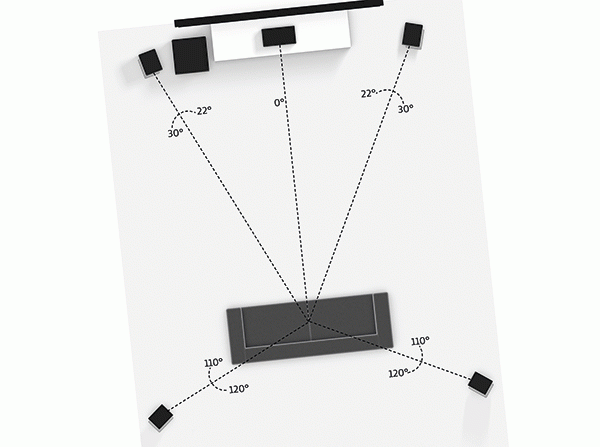
Dolby’s guidelines, which are a sensible jumping-off point, recommend a 22-30-degree angle for front left and front right speakers from your listening position (see diagram, right). The more technically focused International Telecommunications Union (ITU), meanwhile, specifies a 30-degree angle.
Let's stick with 30 degrees. For systems where speakers are placed behind an acoustically transparent projector screen, this is easy to achieve. But when they are sat either side of a TV or projector screen, you’ll need to factor in the distance between screen and seating, and the size of the screen. Optimal viewing distance is a whole other topic itself with recommended angles that have widened with the arrival of 4K resolution displays; if you’re someone who likes to go full IMAX and sit ‘close’ to your display, it may be that your speakers need to go beyond that 30 degree angle. In this case, angling them to face the listening position ('toe-ing in') is recommended.
For the front left and right speakers, tweeters should be at ear height, or as close as is practicably possible. Floorstanding models aren’t all the same height (some are less than 1m), and neither are our sofas and our own heads, so what’s important, given the greater directionality of high frequencies compared to those in the mid and low ranges, is to make sure tweeters aren’t too high or too low, or all that audio information will pass right by you.
Centre channel placement is more straightforward. Ideally, it should be directly in front of your listening position, and again positioned at head height. For TV-based setups, you’ll have to place it either above or below the screen. In many environments, it's often easiest to mount a centre speaker underneath a TV (on an AV cabinet, for example), and this is typically at less of an offset than if it's positioned above. If it's placed very low, using a support to angle the speaker upwards towards you is recommended.
Picking sides
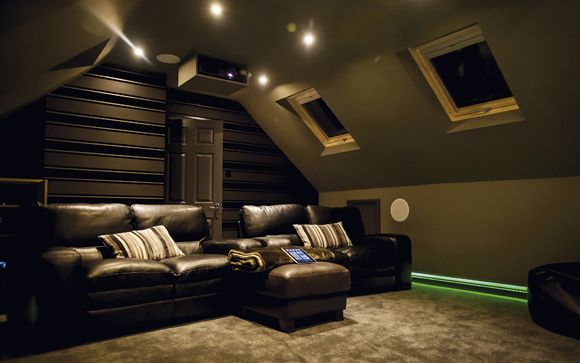
Surround speaker placement guidelines are perhaps the hardest to adhere to if your cinema isn't a dedicated room, as they are meant to be sat more to the side of the listening position than behind it (Dolby's recommendation is a 110-120 degree angle, the ITU's is 100-120 degrees). In a 'real world' environment, a behind-the-sofa installation is often preferable to side-wall installation or freestanding speakers in the room, so in that instance try to get them as wide apart as possible.
The recommendation for surrounds is, again, for a tweeters-at-ear-height installation. In some environments this might not be an option for practical reasons. Or you might prefer to mount them higher up because you have a high-backed chair, for example. In this case, angle your surrounds downwards if possible (which is quite likely how the surrounds are installed at your local multiplex cinema).
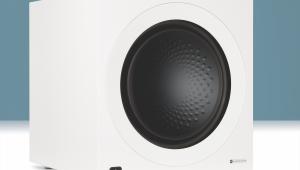
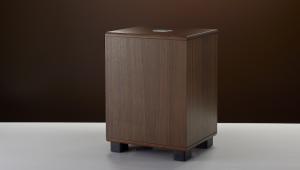
The last piece of the 5.1 puzzle is your subwoofer. Here, there's much more placement flexibility due to the omnidirectional nature of low frequencies; no matter where you put your sub, you'll hear it. That said, with lengthy bass waves radiating in all directions, they'll interact more noticeably with your room, so experiment with positioning to reduce the likelihood of annoying peaks and troughs in frequency response (don't hope to completely eradicate them).
A preferable position is at the front of the room, to better integrate the subwoofer at the crossover point with your LCR speakers, but this won't necessarily always be where your woofer sounds best.
7.1 surround
Ever since the Dolby Digital Surround EX soundtrack of Star Wars: The Phantom Menace, the idea of adding sound 'back there' hasn't gone away. And why not? It makes sense to fill out the rear of the soundstage – particularly if you have room for the speakers...
To set up a 7.1 system (the format that has replaced the 6.1 tracks of yesteryear and is the base layer of all Atmos tracks), you simply add a pair of speakers behind the listening position. Well, almost. If you're keen to follow Dolby's guidelines, the introduction of rear surrounds necessitates slightly moving your existing surround speakers.
In a 7.1 array, the rear surrounds should be positioned at an angle of 135-150 degrees in relation to the listening position. And because 135 degrees is rather close to the recommended 120-degree maximum of Dolby (and the ITU), the suggestion is to move the surrounds further forward, to between 90 and 110 degrees. The result is a more even spread of surround and rear surround effects.
The distance of your listening position to your screen essentially dictates the distance of your LCR speakers. With rear surrounds, you'll likely have much less space to play with. Aim to have them forming a straight 0-degree line with your front L/R speakers, and not sat right next to your noggin.
Dolby Atmos/DTS:X
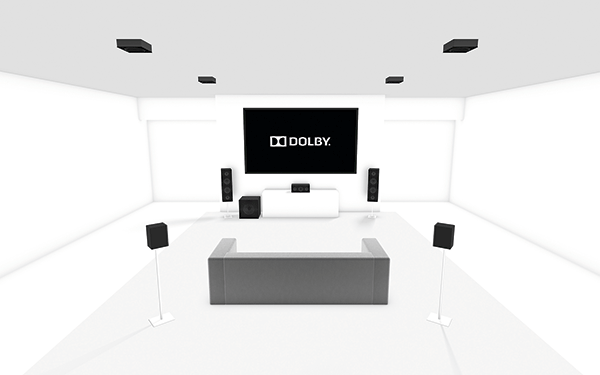
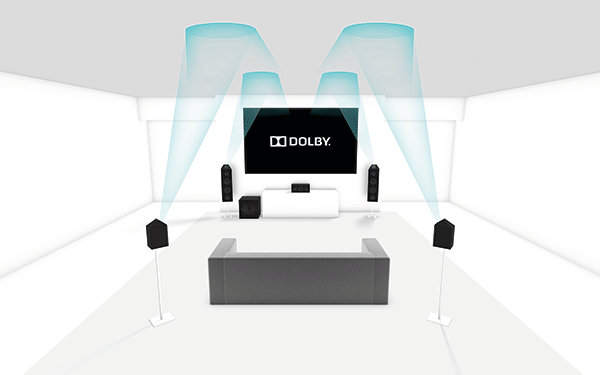
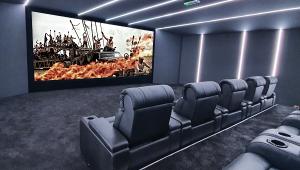
The 3D audio formats – Dolby Atmos and DTS:X – represent the current pinnacle of home cinema sound. The chances are you either have a setup already, or desperately want one. But as they make use of an overhead sound layer, they aren't a simple install, although thankfully there's plenty of flexibility in what you can do.

While the two formats don't recommend the same speaker layout (in the 'Pro' form of DTS:X, a single directly overhead speaker is suggested, while Dolby says speakers should only ever be added in pairs in an Atmos system), the majority of home cinemas either add two or four speakers to a 5.1 or 7.1 system – creating, for example, a 7.1.2 setup. And, helpfully, Dolby has guidelines on where these should go (DTS is a lot more vague...).
If you're able to fit in-ceiling overhead speakers in your room, you'll likely be able to put these in the correct position (barring light fixtures getting in the way.) Something to be aware of, however, is that there's a different position for a single pair of overhead Atmos speakers to either of the two pairs in a four-speaker system, so upgrading from two to four Atmos heights at a later date would require some reinstallation for optimal results.
In a 5.1.2 or 7.1.2 setup, the Atmos overheads – termed Top Middle – should ideally be placed in line with the front L/R pair and slightly in front of the listening position, at an angle of 80 degrees (although the wider spec is 65-100 degrees, which allows for an installation a little way behind the head).
Dolby specifies in-ceiling speakers with a wide dispersion – 90 degrees both horizontally and vertically – to avoid height audio sounding too localised. However, as many manufacturers don't reveal dispersion characteristics for their consumer products, and it's not something that's easy to objectively measure, there's little point getting too hung up on this. The majority of models sold for use in-ceiling should have a wide dispersion, and some have 'aimable' tweeters allowing them to be targeted at the listening position.
A better, more enveloping Dolby Atmos experience is delivered by a system with four overhead speakers. Here, the front pair (Top Front) should be at 45 degrees (or between 30 and 55), and the rear pair (Top Back) should be at 135 degrees (125-150).
Things are looking up
There are many reasons why an in-ceiling speaker installation isn't desirable, but this doesn't preclude you from having a Dolby Atmos/DTS:X setup. Since the Atmos format launched for domestic rooms in 2014, Dolby-enabled speakers – those that feature an angled baffle and reflect audio off your ceiling to your listening position – have been available, first
as a trickle, but with more arriving each year.

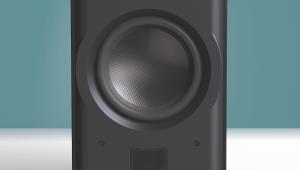
Upfiring drivers are also used in Dolby Atmos soundbars (although some rely entirely on DSP to engineer an overhead effect). Dolby even recommends upfiring speakers instead of overhead models in certain situations, such as rooms with less than optimal ceiling height – again in an effort to create a more diffuse sound akin to that of a commercial theatre.
For a speaker to be certified Dolby Atmos-enabled, it has to feature a specific crossover that adjusts high-frequency response. Coupled with the angle of the driver, the module's dispersion characteristics and DSP in an Atmos-enabled AVR, this 'psychoacoustic processing' is designed to help fool our brains into perceiving sound is coming entirely from above.
So, where should you position your Dolby-enabled speakers? On top of your front and surround enclosures. Indeed, most models on the market are part of wider loudspeaker ranges and are specifically styled as an aesthetic match for supporting floorstander or standmount models. Some, such as Jamo's S 8 ATM, will only work with stablemate speakers, as their binding posts are actually housed on Jamo's floorstanders, but the majority of Dolby-enabled speakers can be used with any speaker you want. Some companies (including Definitive Technology and Focal) even sell speakers that physically integrate the upfiring driver within a traditional front-firing speaker.
Again, Dolby has a suggested target to aim for, namely use in rooms with ceiling heights between 2.4m and 2.7m. A flat ceiling surface is also (obviously) recommended.
'You can go your own way'
Do note that you don't have to go the Dolby-enabled route. Some audio brands aren't adherents to its 'psychoacoustic engineering' frequency filtering, and instead sell non-certified speakers that still feature an angled baffle. Some of these, such as DALI's Alteco C1 and SVS's Prime Elevation, also feature fixings to allow them to be positioned at
the top of a wall, just below the ceiling, aiming down at the listening position. In some environments, this is a simpler solution than using upfirers, and in our experience can work very well.
What you're looking for with a Dolby Atmos system is an effective overhead sound layer. How you get there is really up to you...
The next step – EQ
With your speakers in place and wired up to your AV receiver or processor, the temptation might be to kick back with a movie. But first you need to EQ your system.
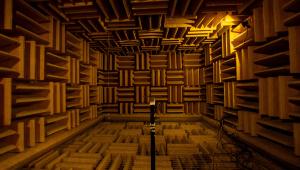
Why? Because unless you live in an anechoic chamber and have identical (and perfectly matched) speakers all around you, the sound from your multichannel array will benefit from some tweaks. This is because what you hear isn't just the speakers themselves, but the effect of your room.
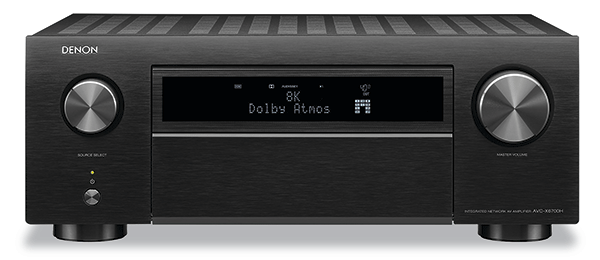
All modern AV receivers feature some form of automated room EQ. These range from basic to high-spec, but all have the same goal – to deliver a smooth frequency response from your system (particularly with regards to bass), with matched levels all around and audio arriving at your ears at the same time.
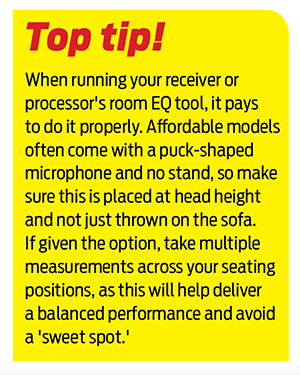
Generally, the process with all systems is the same. A supplied microphone is plugged in, and once the EQ is initiated, your speakers emit test tones. These are measured by the microphone at your listening position to assess speaker distance (it's worthwhile double-checking these measurements, as a few errant bookshelves have been known in the past to yield inaccurate results), delay and frequency response. Analysis is carried out, and your receiver/processor's silicon then adjusts output to compensate.
Great expectations
Room EQ isn't a cure-all panacea. Firstly, you shouldn't, let's face it, expect wonders from the onboard system in a £400 AV receiver – measurements and corrections will be far less refined than on a premium model. Secondly, even once an EQ system has discovered a frequency response issue caused by your room, it's likely that the only genuine solution is to address the room itself (either through acoustic treatments or a sledgehammer), not the speakers. That said, compared to the other options – doing nothing, or using an SPL meter to at least ensure level-matching – automated EQ makes sense.
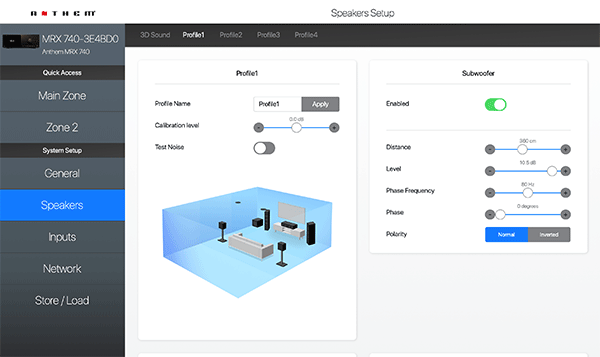
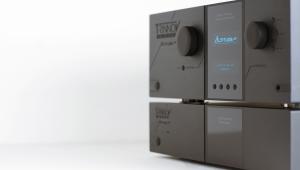
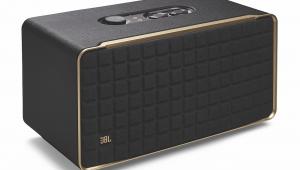
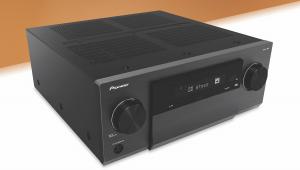
It's also getting smarter, with the likes of Dirac Live (used by Arcam and NAD), ARC Genesis (Anthem and Paradigm – pictured below), Room Optimizer (Trinnov) and Audyssey MultEQ (Denon, Marantz) offering greater granular control and flexibility than the systems of yesteryear (particularly, in the case of Audyssey, if you invest in the £20 app upgrade).
What's important with EQ, especially with the more rudimentary systems, is to also trust your ears and accommodate personal taste. Chances are, a post-EQ system will sound better than before – tighter, more evenly balanced across the audio band, with greater dialogue clarity – but if you find your superstar subwoofer now sounds like it's lost a bit of punch, or your Atmos height channels are a little shy, don't be afraid to make your own adjustments. You can spend as much time as you like in post-EQ experimentation, and you if end up with a total mess of a soundstage... you can simply run the room EQ system again.


 |
Home Cinema Choice #351 is on sale now, featuring: Samsung S95D flagship OLED TV; Ascendo loudspeakers; Pioneer VSA-LX805 AV receiver; UST projector roundup; 2024’s summer movies; Conan 4K; and more
|
| Hardware | Software | Features Installs | Latest News Awards Newsletters | Resources | Subscriptions |
WHERE TECHNOLOGY BECOMES ENTERTAINMENT
 © 2026 Home Cinema Choice
AVTech Media Ltd
All rights reserved